|
|
|

Home
Soaring Toyota MR2 Mk 1 Yamaha Super Jet Radio Controlled Mountain
Bike
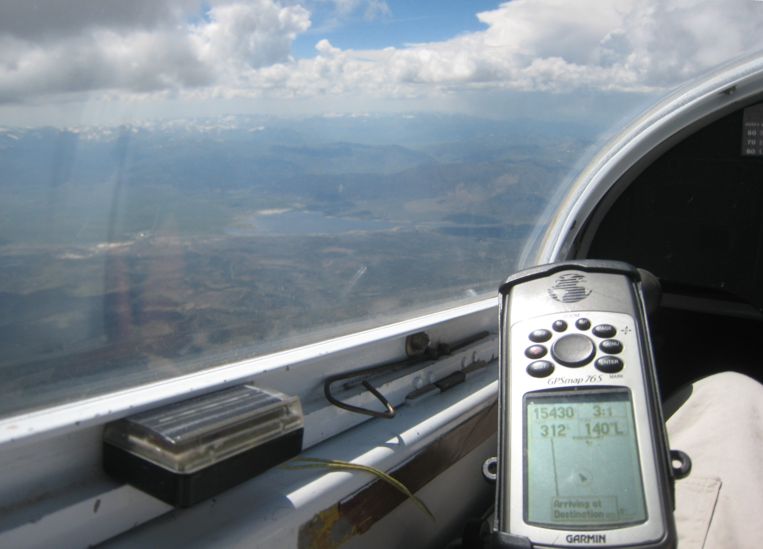
76s
and solar
powered vario, a couple of simple instruments that do a really big job. (manual
for vario)
I
use this for soaring and I will share how I set up the screen to display the
data I find useful. Of course one would like as many fields as possible, but
there comes a point that they are too small to see. The following are screen
shots of the pages I use:
Hear
is the only place I have speed over the ground and the date. I have the time of
day on another page, but this is one place to always find it. GPS elevation is
only here as the Altitude Page has barometric altitude.
On
this map page one can zoom way in to watch how the thermal is tracking. I just use
a regular road map from Map Source. Using the Topo maps are cool, but the
contour lines are confusing. The waypoints are shown here and I have symbols to
distinguish airports from ultralight strips and dry lake beds. I thermal on
this page so I like having altitude to check my progress. When on glide I like
to keep the glide to destination at 18 to 1 or better and I can check to see if
I am loosing in this field if it goes up to 19 to 1 or worse. The track helps
me go straight on a glide much better than a regular compass because with a
compass you have to guess a cross wind component. If I have a destination
keeping the turn field at 0 is all I need to stay on track. I can do most
everything from just these 4 fields.
This
is overkill if you need it for glide. Turn is the only good one. It is good if
I want to know how far to the way point. Vertical speed and glide to
destination are supposed to be something to compare with the bottom two:
vertical speed and glide you are getting, but they bounce around so much it is
not very useful.
This
is kind of a bogus page, but it I use it if I really want to know when I will
arrive. The turn and track fields keep me going straight while I check the
time. The glide ratio to destination is always good to have up in case you are
loosing ground and the elevation is good if you stop to circle you can see
right away if it was a waste of time.
This
active route looks useless but I haven’t always got the waypoint labeled and I
check this once in a while to make sure I have the destination in that I
thought I had.
The
altitude page has the average ascent which is good to see if the thermal your
in is matching up to the rest of the day. It is the only averager of sorts, but
remember it is including the weak ones from when you started. Checking the
graph is good as you top out the thermal to see if it is getting too week to
stay with. If you are climbing to just make it to goal it has glide to
destination as well so I can see when I have my 18 to 1 and can just leave the
thermal.
Batteries:
I have used 1200 mAh NiMH batteries and they only last 7 to 8 hours which can
bite you on long flights. 2500 mAh NiMH last well, but experience has shown
that a handful of regular alkaline batteries are very idiot proof.
MAKING
TRACK LOGS: Oversimplified I have said to just turn it on and download with
g7towin software to make an IGC track. Really it is a bit more of pain than
this. If you leave it always logging tracks you will have points recorded during
the download that really are not part of the flight. It has a save function
which always suckers you in because saving seems like something one should
always do, but don’t! Saving to the unit truncates the track to just a few
points.
So
here is the long version: During pre flight I turn on the 76s.
First
set the altimeter. Press Page until you are at the altitude page. Press menu.
Scroll down to Calibrate Altimeter. Press Enter. Scroll up to the field that
shows the number. Press Enter. Scroll sideways to the number to change. Scroll
up or down to change the number. When number is right press Enter. Scroll down
to the where it says Set and press Enter.
Clear
old data: Press Menu twice. Press Enter when on Trip Computer. Press Menu
again. Scroll down to Reset All - which really doesn’t clear all. It asks if
you really want to do this. Scroll until Yes is highlighted and press Enter.
Now press Menu again and scroll down to Reset Odometer. Press Enter. Press Quit
to exit.
You
should have just gone back to the Main Menu. (Main Menu from a regular page is
pressing menu twice.) Scroll down to Tracks. Press Enter. Here is where the
save thing is shown. Never save! Scroll sideways to Clear and press Enter. It
asks if you really want to do this. Scroll sideways to Yes and press Enter.
Press Quit to exit. Highlight Tracks again and press Enter. Press Menu. Scroll
down to Set up Track Log. Press Enter. Now if you ended the last flight right,
Recording should be set to OFF. Scroll up to where Off is highlighted and just
leave the GPS on until you are ready to launch.
Getting
ready to launch you don’t want to mess with things, but you want the track to
start so when I get in is when I do the following: Off is highlighted so press
Enter. Scroll down to Stop When Full and press Enter. Scroll down until OK is
highlighted and press Enter. Press Quit three times to go to the regular pages
and you are ready to fly.
Now
when you are done flying you want to stop the track log. Press Menu twice.
Scroll until Tracks is highlighted. Press Enter. Don’t Save or Clear the tracks
as these are your choices. Just press Menu to move to the next page. Highlight
Setup Track Log. Press Enter. Scroll up until Stop When Full is highlighted.
Scroll up to Off and press Enter. Scroll to OK and press Enter. Again you are
asked to Save or Clear but don’t do either! Just press the power button and
turn it off.

Now
when you get to your computer the thing won’t add any more tracks to your path.
Use g7towin or whatever to save as IGC track.
I
use Map Source to download tracks I can see on a map
I
use G7toWin to make an IGC file which of course is not useful for comps or
records because this unit is not secured and approved.
I
use the OLC to make Google Earth files.
The
owners manual, firmware updates are available at the Garmin web site. Same for
Map Source.
I
started out with the etrex and it was a little small to see. Having both I
wrote a little ditty comparing the two:
GPSmap
76S vs. eTrex Vista for the Soaring Pilot.
I am a pilot of Hang
Gliders and Sailplanes. The GPSmap 76S is listed as a marine unit, and the eTrex
Vista is listed as an outdoor unit. Neither is intended for aviation, however
many of us find a portable GPS with barometer and 3D trace very handy.
The similarity of these two units encourages the
comparison. The hardware is the difference. The expected use will determine
whether the Vista or 76S is right for you. The Vista is not only small, but
easy to use with only the left hand. The 76S is large and easy to use with any
finger, if mounted. So if the portable GPS to stay in a pocket until needed,
the Vista is ideal. If one intends to mount it, the 76S is better.
Antenna:
The 76S will lock on the satellites first. The Vista antenna works best with
the unit flat and the 76S’ works best upright. The 76S has a place to plug in
an external antenna whereas the Vista does not.
SCREEN: The screen is larger on the 76S. This alone
may not be that impressive, but with the larger screen one can display more
fields in larger fonts. The 76S is harder to see in some light. At first glance
it is greener than the Vista. The Vista is more readable with sunglasses on or
in dim lighting. I often leave the back light on with the 76S. One really needs
to compare the screens for themselves. I am happy with the Vista screen, but my
girl friend who wears glasses won’t use it because of the screen size.
BATTERY LIFE: My own experience is with the compass
“off” and in “normal” not “battery saver” mode running Radio Shack 1500 mah
NiMH batteries. The 76S lasted for an 8 hour flight and I had enough battery
left to download the tracks. The eTrex Vista is about the same. If you stay up
longer than this, you may want to try alkaline batteries.
INTERFACE: The Vista has a unique button system;
great for one hand operation. However, to the uninitiated, it can be
frustrating. Entries are not confirmed with an audio beep as in the 76S. When
soaring, one wants to keep the eyes outside, but the Vista encourages one to
look at the screen for confirmations and menu choices. The 76S has beeps with
each button pushed. The Vista can use the menu to go directly to the desired
page. To the see the various pages in the 76S one must go through each page one
at a time.
WAYPOINTS: Both hold 500 waypoints. The Vista has
no provisions for comments whereas the 76S has a comment field with 16 characters.
Peter Kelly and others who share turnpoints on the web put some information in
these fields like airport data.
ROUTES: The 76S has 50 routes available and the
Vista has 20. Both have a page that lists a route’s waypoints. However, only
the 76S can scroll left, exposing: the distance to each, course, eta, fuel, leg
distance, leg fuel, leg time, sunrise and sunset at waypoint, and time to. The
76S has a compass page like the Vista and in addition a Highway Page the Vista
does not have. The name: “Highway”, lead me to believe this page would be
useless for soaring. But even if the pictorial is not that helpful; the page
offers a place for even more data fields big enough to read at a glance.
Barometer:
It is the sensor that makes both these units so appealing to the soaring pilot.
Yeazel and Mehaffey do a great job of explaining this sensor and how they
differ in each unit. (http://www.gpsinformation.net/waas/g76s/g76s-map.html)
In short, the 76S will have a field named: “Barometer”, which is the normalized
pressure one gets from the airport. The Vista will show ambient pressure in
this field called: Barometer. This gives an edge to the 76S for aircraft work.
TRACKS: The 76S will hold 5,000 points vs. the
Vista’s 3,000 giving a tighter trace or longer coverage. The 76S can save more
tracks but saving a track in either will produce a truncated track of just a
few hundred points, so one wants to download the track, rather than save it with
either unit.
MAPS: The map page of the 76S can show the course,
bearing and heading as line protruding from the triangle and the Vista does not
provide all these. The 76S can display both Metroguide or Topo at one time or
just one set of maps from a single menu. The Vista maps are chosen one by one.
DATA FIELDS: The 76S has more data fields available
for each of the pages. This gives a flexibility to mix information on one page.
For example on the 76S one can have the data field: “average accent” on the map
page. As I go on glide I want to ovoid anything less than this average. The
Vista will offer this data field only on the Altitude page.
TRIP COMPUTER: The trip computer on the Vista can
be customized, the 76S cannot. This Page is not very important for soaring, but
it can be used to place data one could not fit on the other pages.
Impressions:
I chose the 76S for the following reasons: The antenna orientation, and
interface buttons make it more suitable for my use: temporarily mounted PED in the
sailplane with a RAM mount. The larger screen size and highway page means I can
display more data fields. Comments for waypoints allow me to add airport
information.
Rumor has it they may make some software for us. It
would be so easy. The most obvious improvement would be aviation maps we could
download; hook the beeper up to the vario so one could have an audio indication
of lift and sink; a field for density altitude and a field for glide angle to
waypoint. Ah… if only I were king.
Recommendations:
The Vista is the best unit to drop in your pocket and take everywhere. It is
the ideal key phob. The 76S has a few features that make it more specific in
it’s application as a dash “mounted” marine unit. One must look long and hard
to see if these are features one is willing to pay for. At the time of this
writing the price difference is considerable at $100.
Many other advancements have come out since this was written. A comparison of the 76Cs And 76Csx is here: http://patrick-roeder.de/reviews/garmin_gpsmap_60CSx.htm
Table comparison with 60 model: http://groups.yahoo.com/group/Garmin_GPSmap_76C/database?method=reportRows&tbl=7
Hints and notes:
http://www.gpsinformation.org/dale/secret.htm
76/Map 76/Map 76S
The reported method to completely reset on of these
units hold the "menu" key and the "quit" key down and then
press the "power on" key. Hold for a full 7 seconds and then
release. As with the other units all
information will be lost and you will need to reload the almanac and all your
saved user data to make the unit usable.
For the 76S try this sequence to master reset it.
Press and hold quit, Menu, and the rocker down key. Then press and release the power on key. Release the rocker down and wait for the
welcome display. Now release the quit and menu keys.
Screen
Shots captured with xImage